How to create Jira Timeline in 2026
15 min read
If you ever wished you had a more visual way of tracking your team’s work in Jira, the Jira timeline might be it. Creating a Jira timeline is a great start if you want to visualize your roadmap without digging through endless tickets and boards. Timelines are simple, fast, and usually already there in your projects.
However, default timelines might not always cut it, and at some point, you might need a more advanced option for daily tracking and planning. In this article, we’ll cover all scenarios, including how to set up a basic Jira timeline, when to upgrade to a more advanced roadmap view, and when to add a dedicated plugin.
TL;DR
- The Jira Timeline maps epics and child tasks across a date range, helping teams plan delivery across weeks and months. It is available on free and standard plans.
- Built-in Jira timelines work best for a single team running a single project, as it has no cross-project view, capacity planning, or hierarchy above the epic.
- When you outgrow native Jira timelines, you have three options: staying on the basic Timeline for small projects, upgrading to Jira Premium for Plans, or extending Jira with a marketplace app.
What is Jira Timeline?
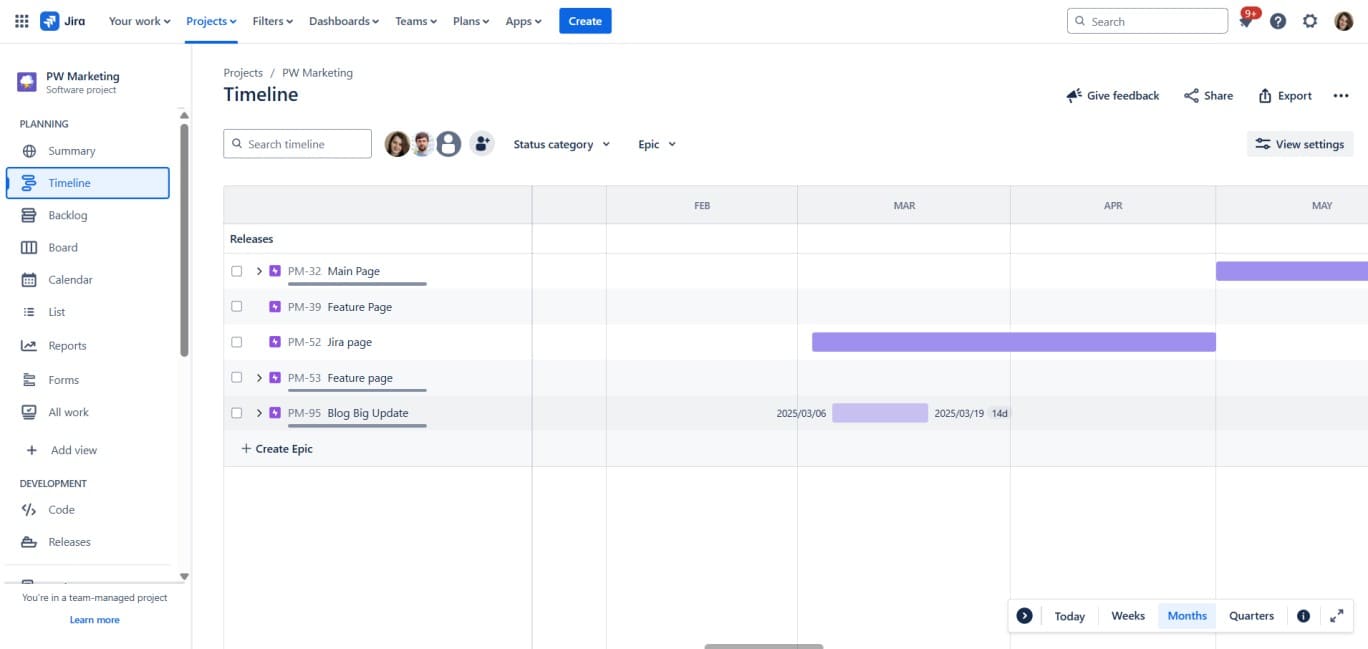
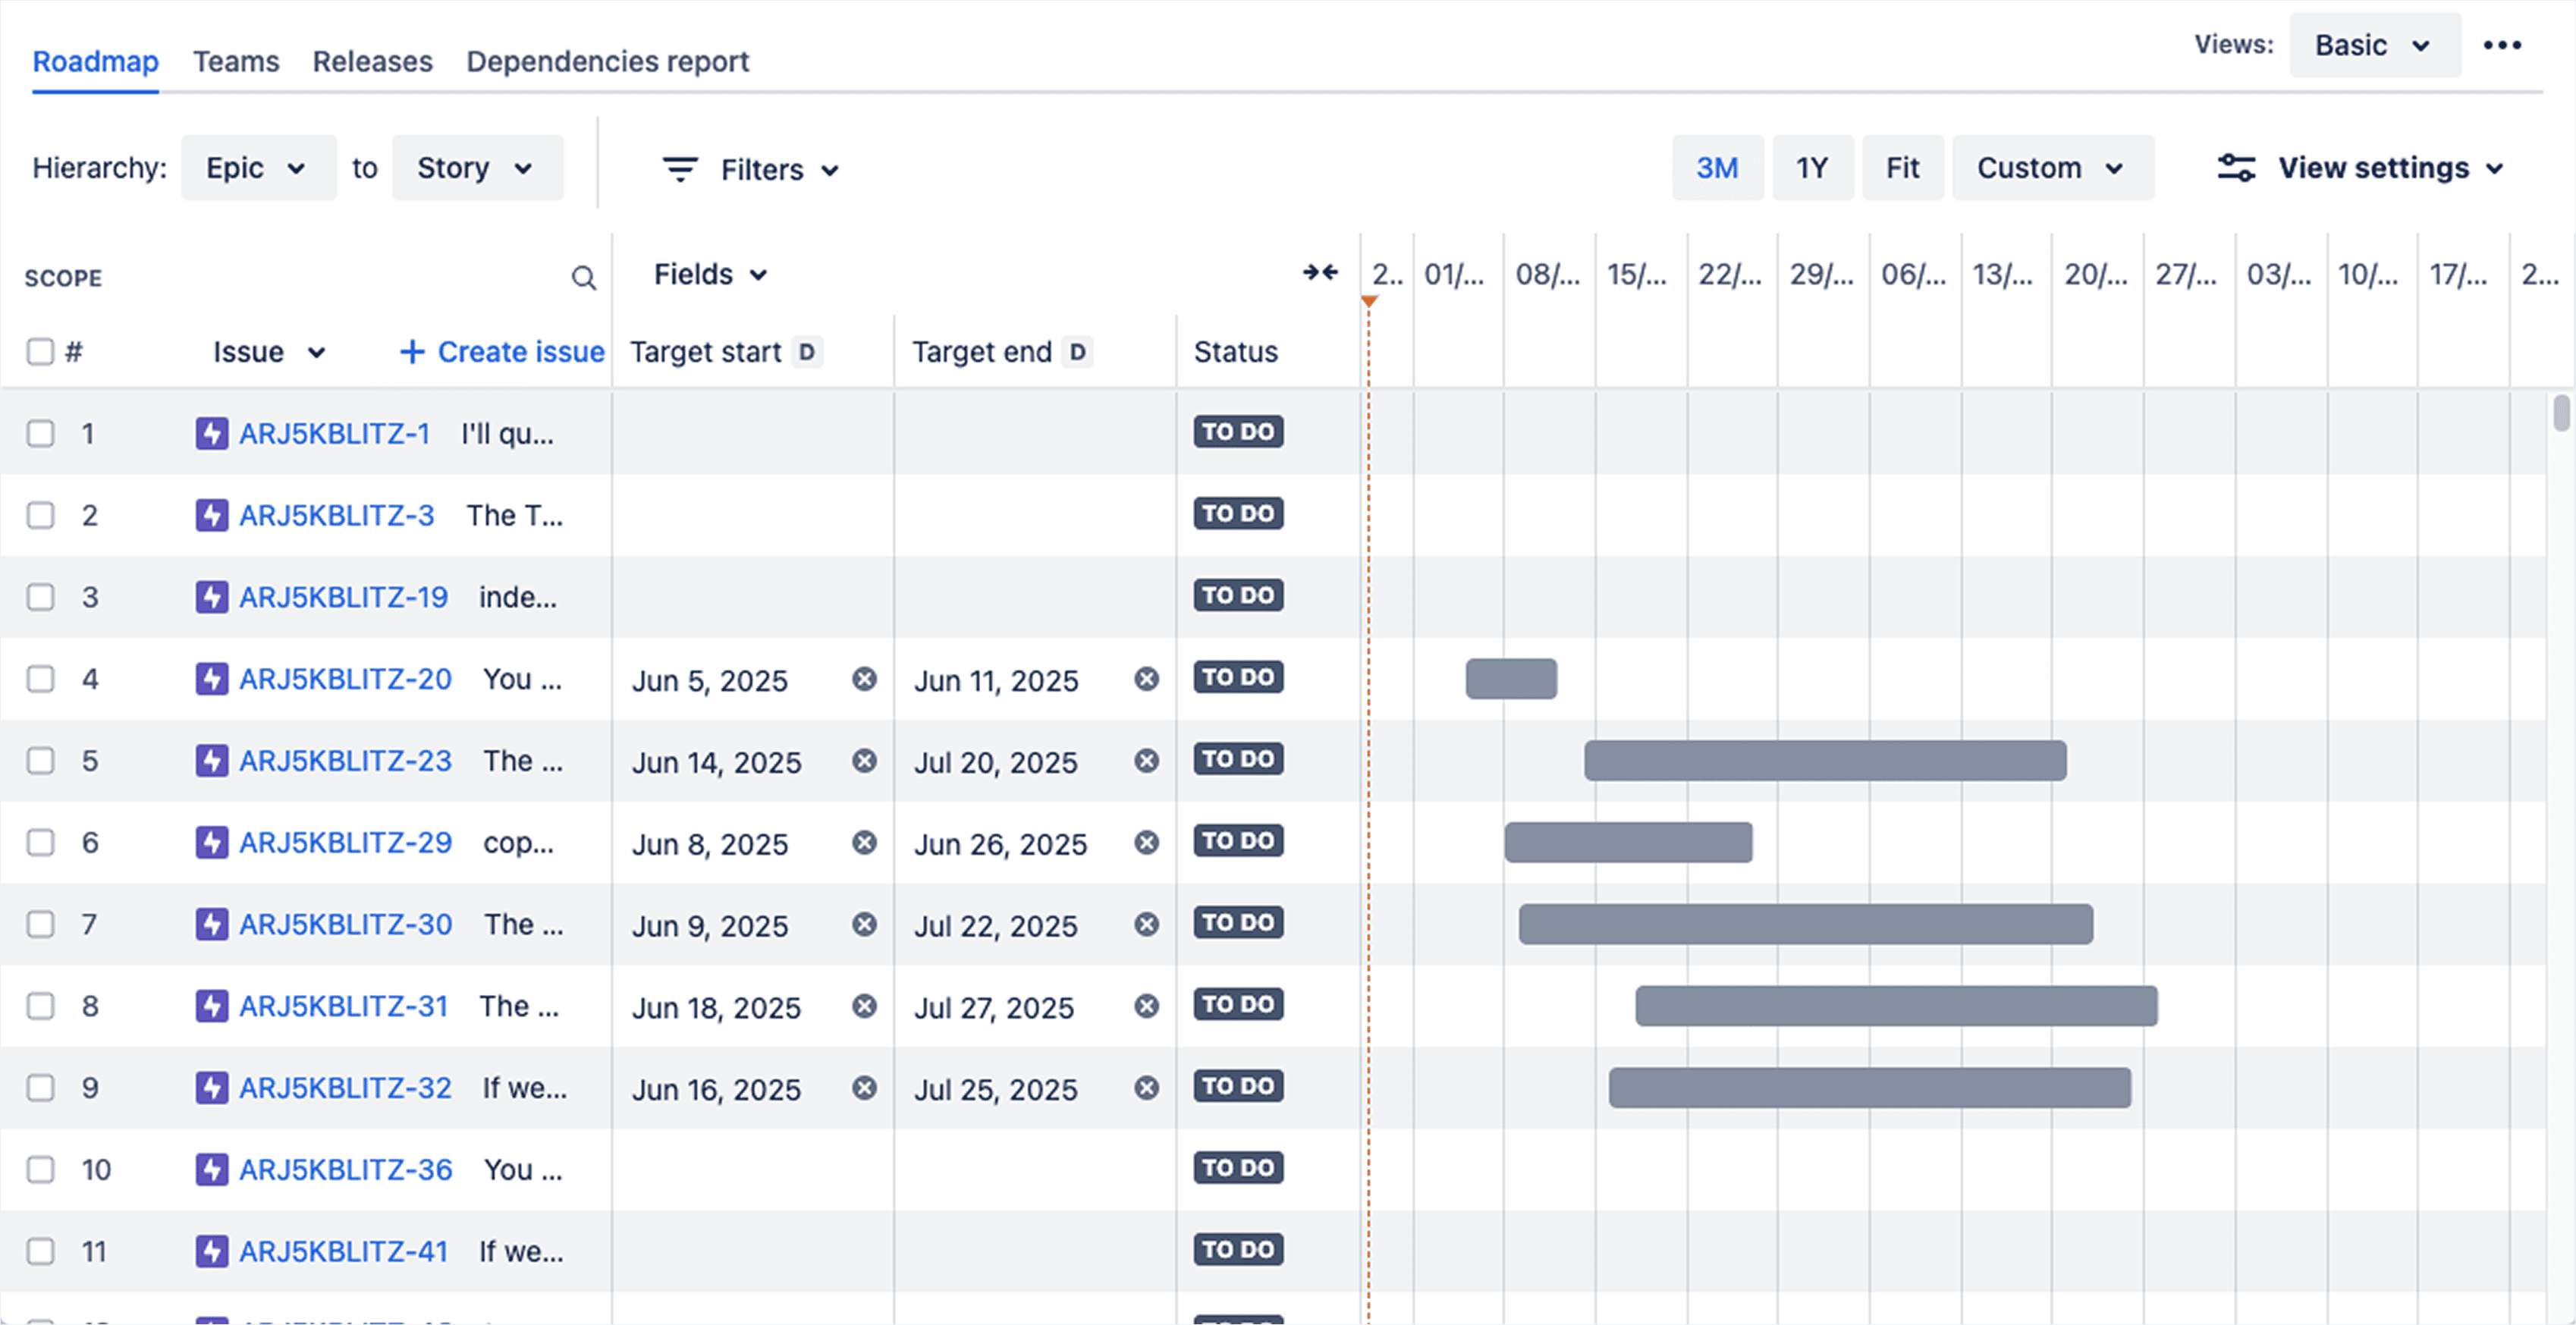
Jira Timeline is a visual planning view inside Jira that maps all your issues along a date axis to help you track progress. Timelines function a lot like Gannt charts, surfacing project details that would otherwise stay hidden in individual tickets. Epics are shown as larger timeline bars covering defined date ranges, while stories and related tasks are placed below them within the schedule. This gives PMs and other Jira users a centralized visual representation of the entire delivery process, including its past, present, and future.
Jira Timeline works well as a starting point for structuring delivery, especially when your planning needs are still fairly light. However, since it wasn't designed to double as a full-blown project management platform, it can feel a bit limiting in terms of advanced resource planning, workload balancing, capacity tracking, and large-scale portfolio coordination.
Setting up your Jira Timeline: hands-on tips and tricks from our team
If there's one thing we've learnt about timelines, it's that they can either turn out to be your best friend or your biggest headache, and the difference usually comes down to small configuration details. Let's take a gander.
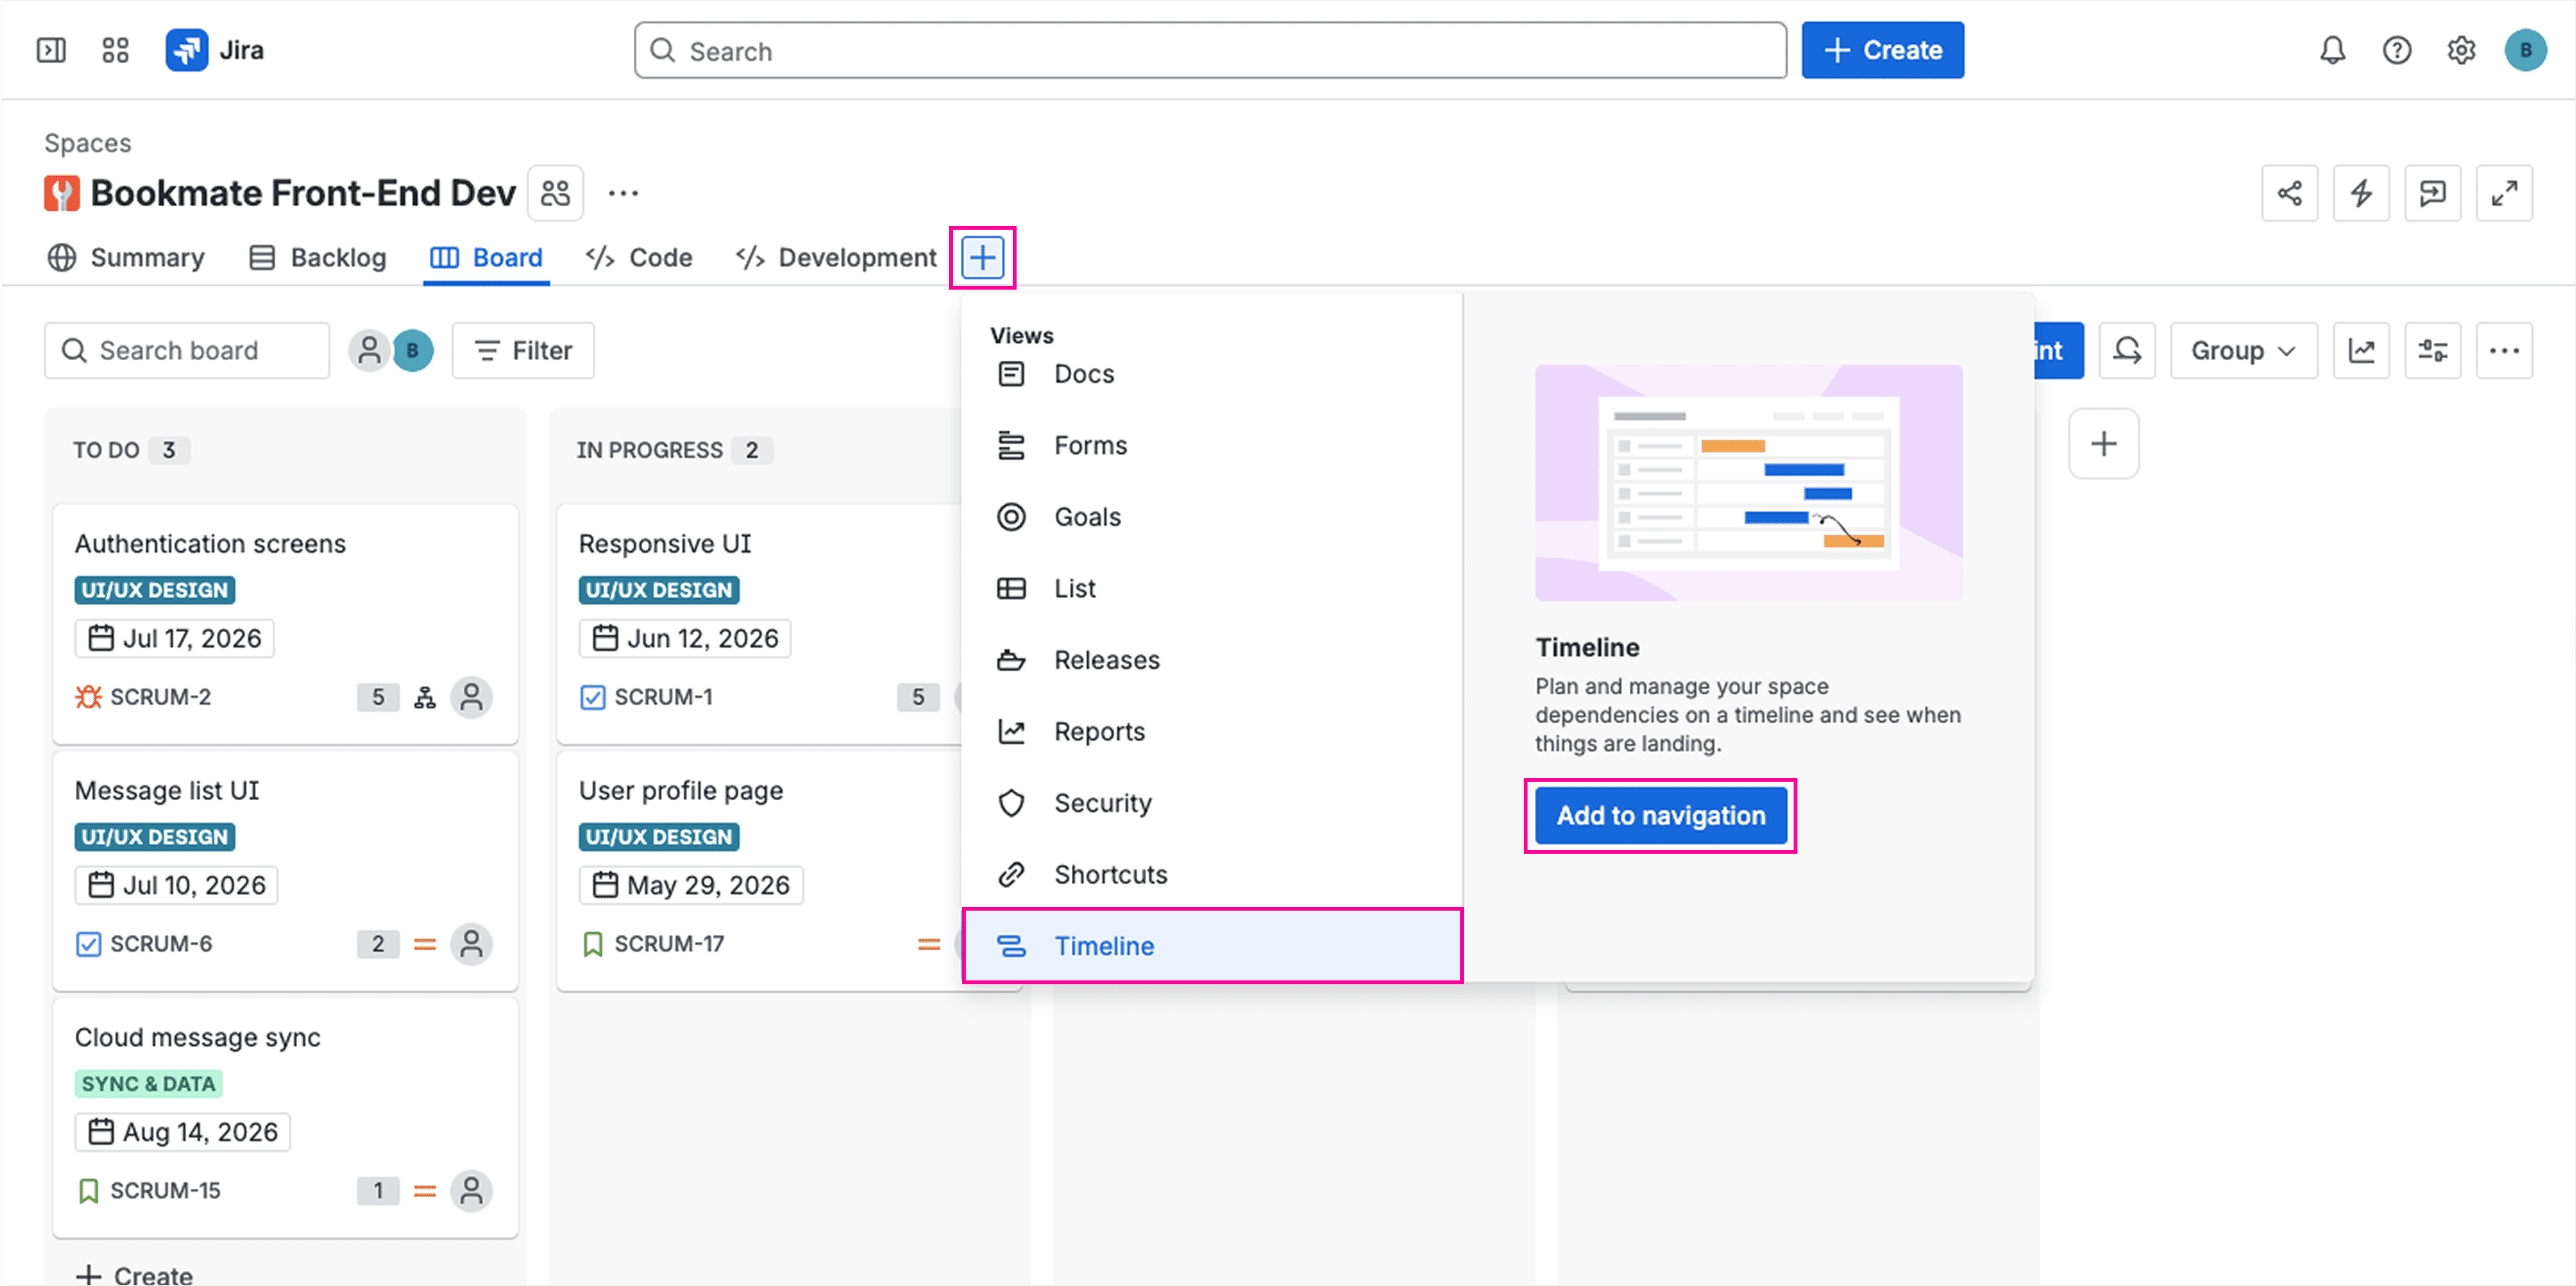
How to create a Jira Timeline view
To set up your Jira Timeline, open your project, then look for Timeline in the left sidebar. While both company-managed and team-managed projects support timeline functionality, there are some differences in how it is configured:
- Company-managed software projects — Timelines are usually enabled by default.
- Team-managed projects — You may need to enable it in project settings under Features.
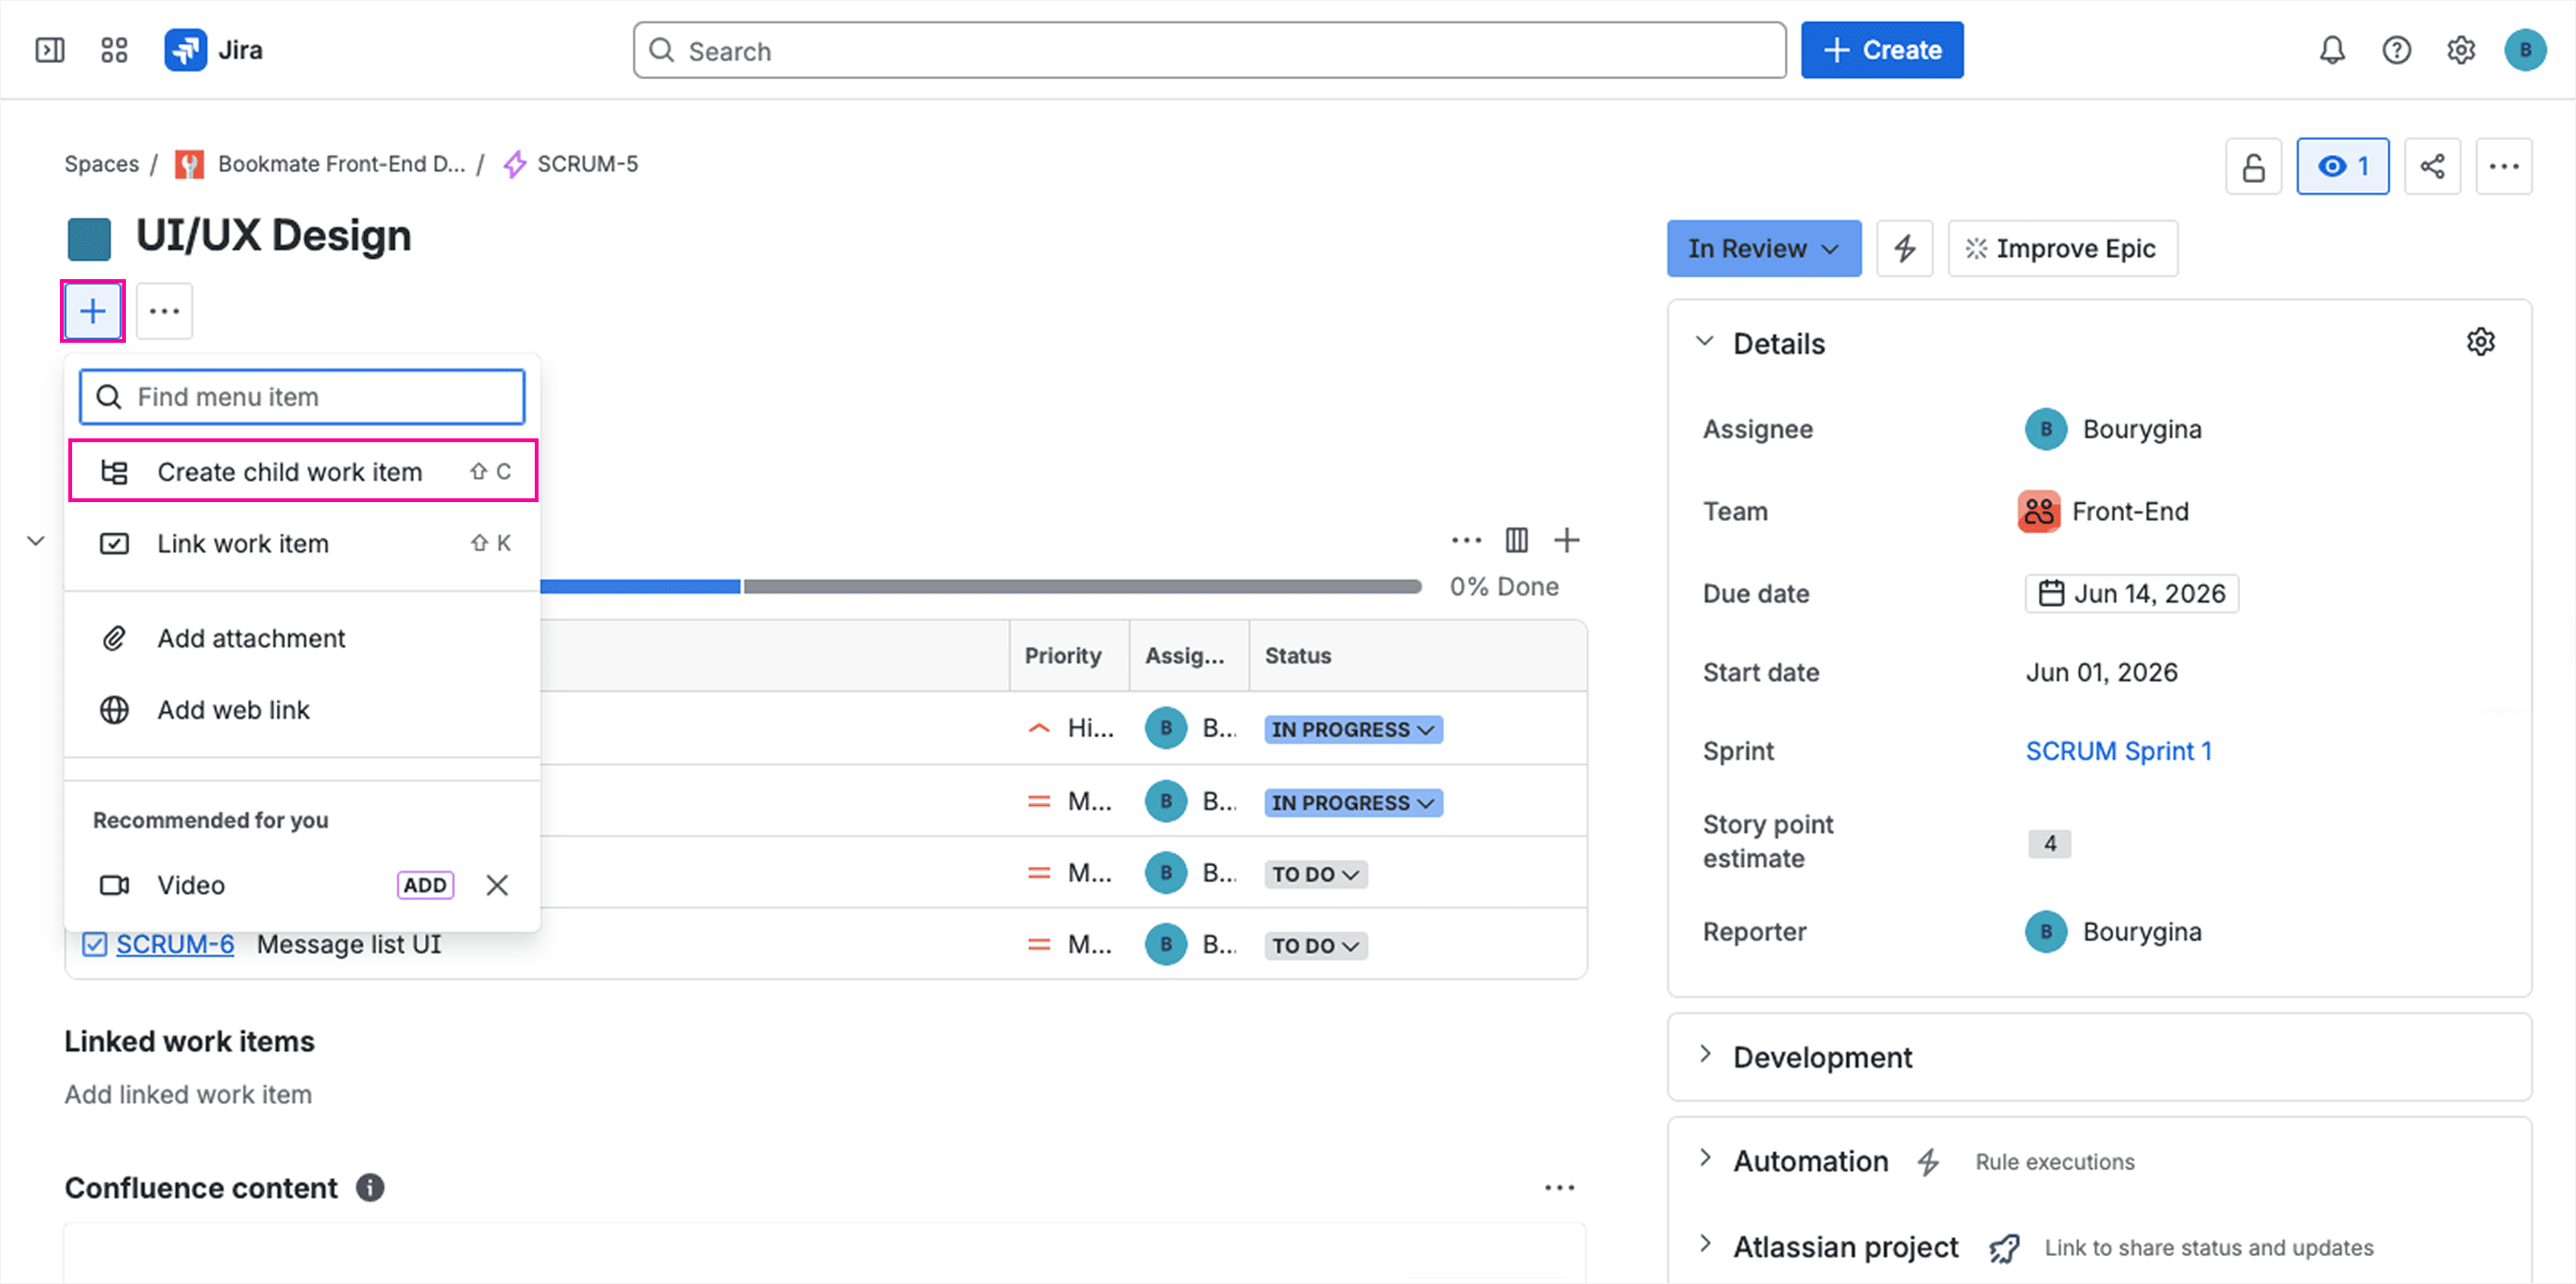
Epics as anchors
The Timeline is built around epics. Each epic shows up as a horizontal bar across the schedule. Child stories and tasks sit beneath the epic. Stories and tasks without a parent epic do not appear on the timeline at all. They only show up on the board and in the backlog.
The usual flow for mapping out a new initiative looks like this:
- Creating an epic on the timeline (or picking one from the backlog).
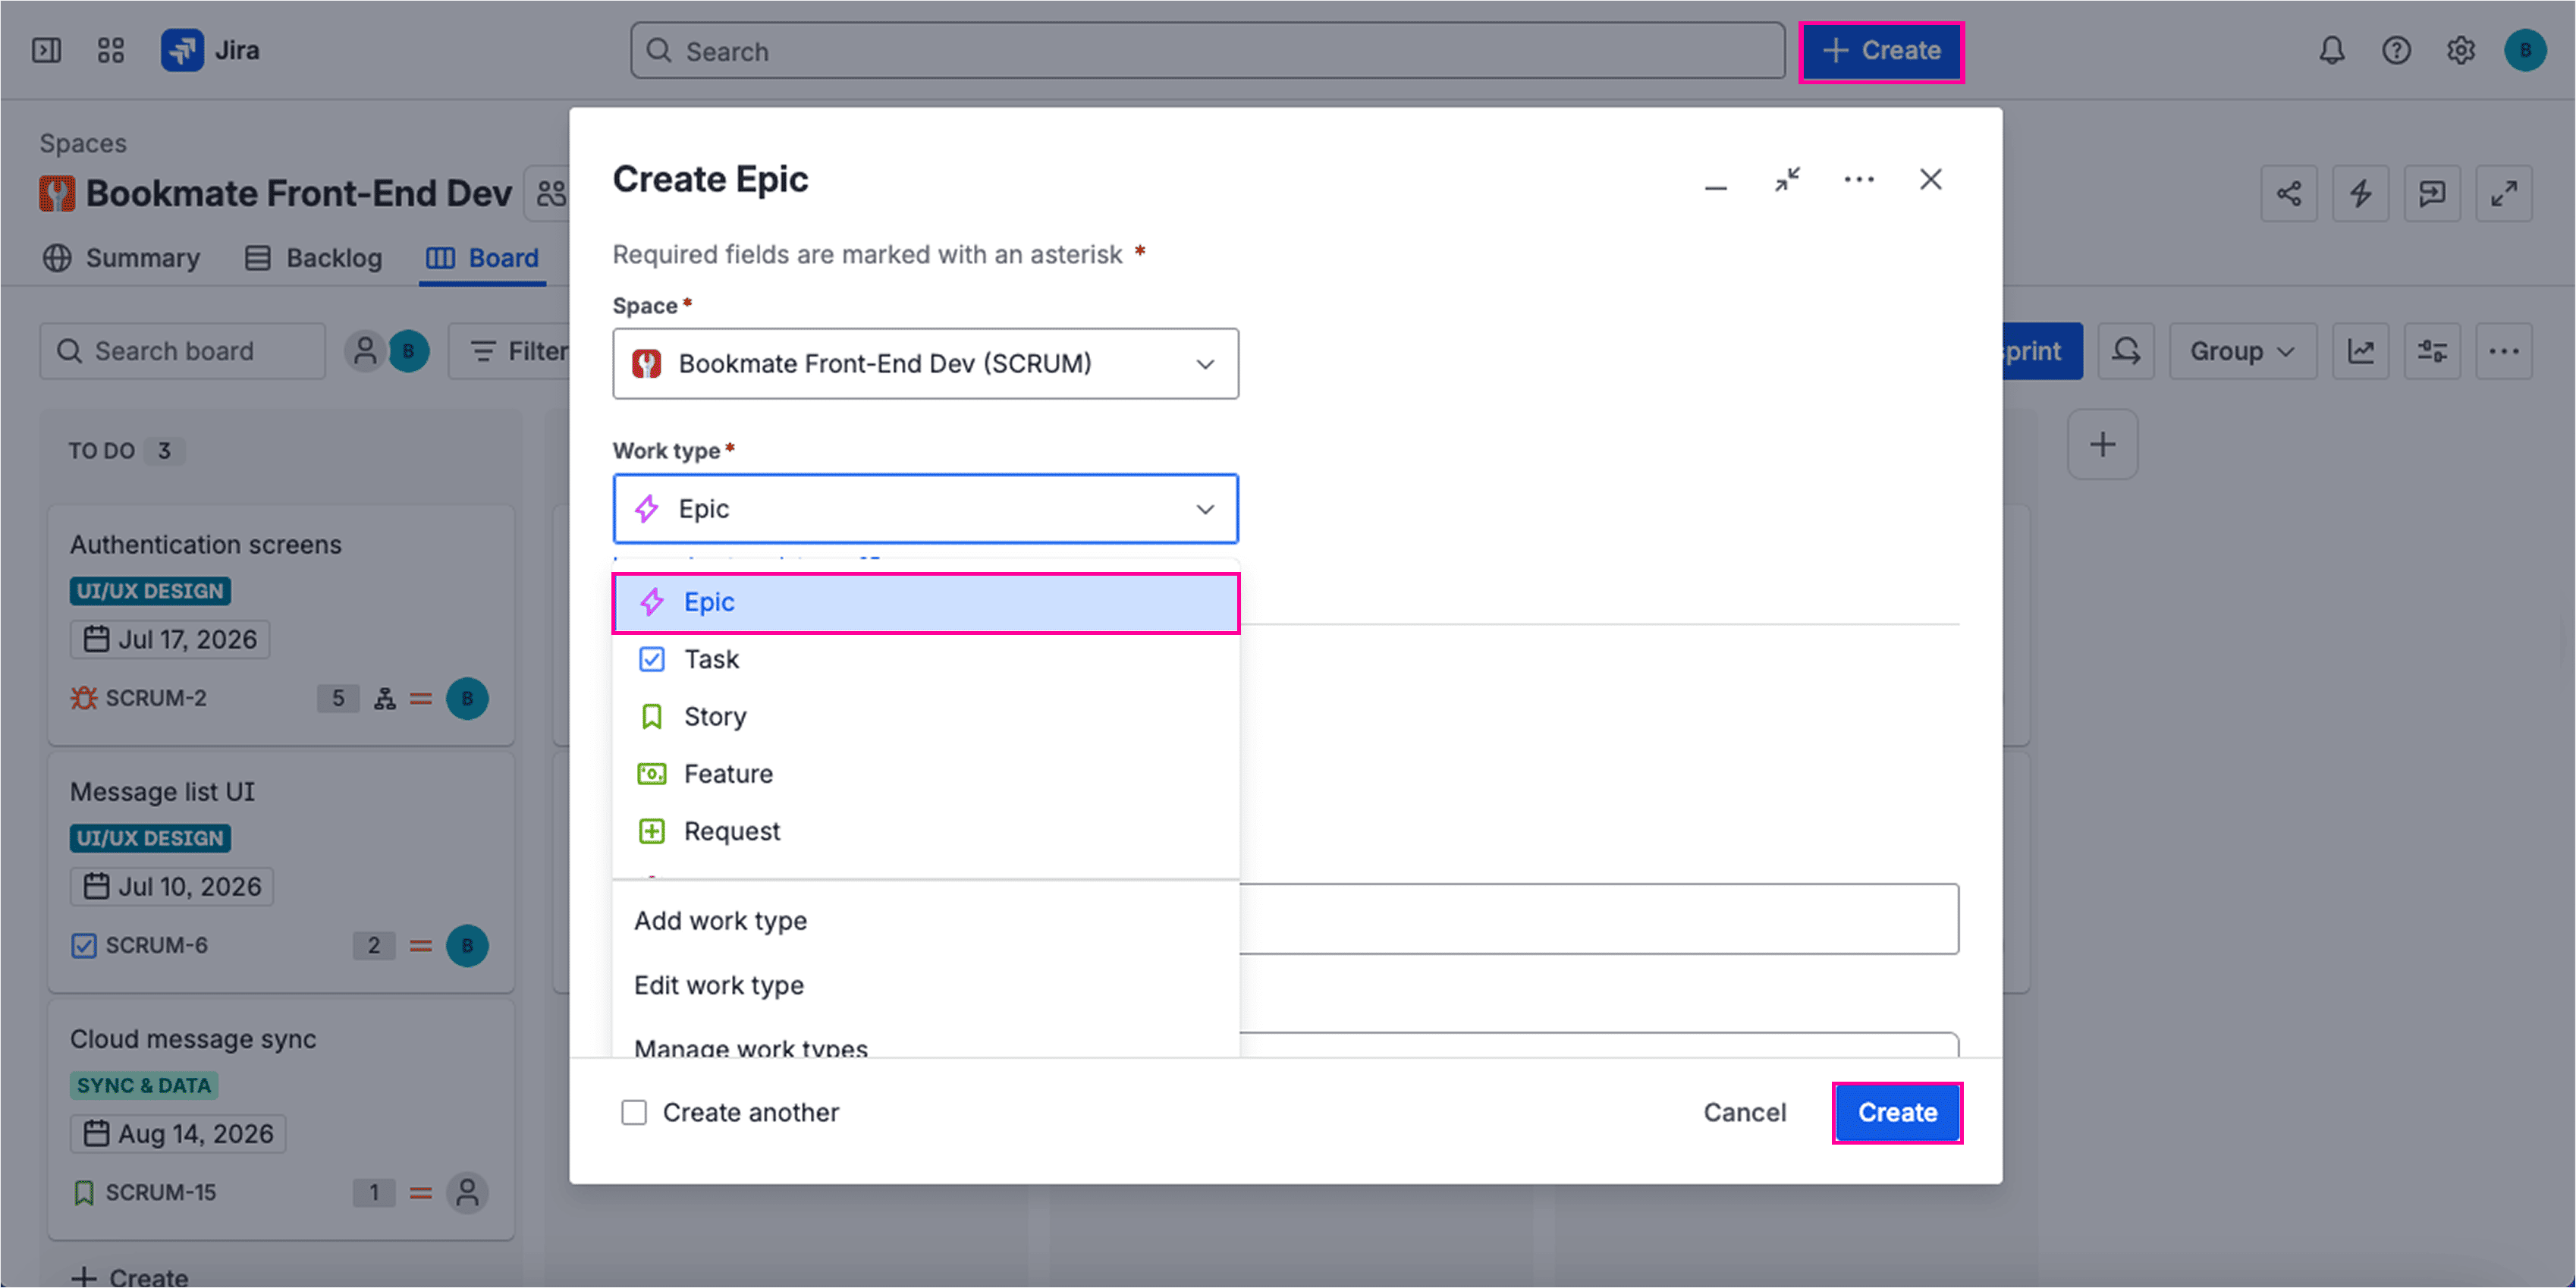
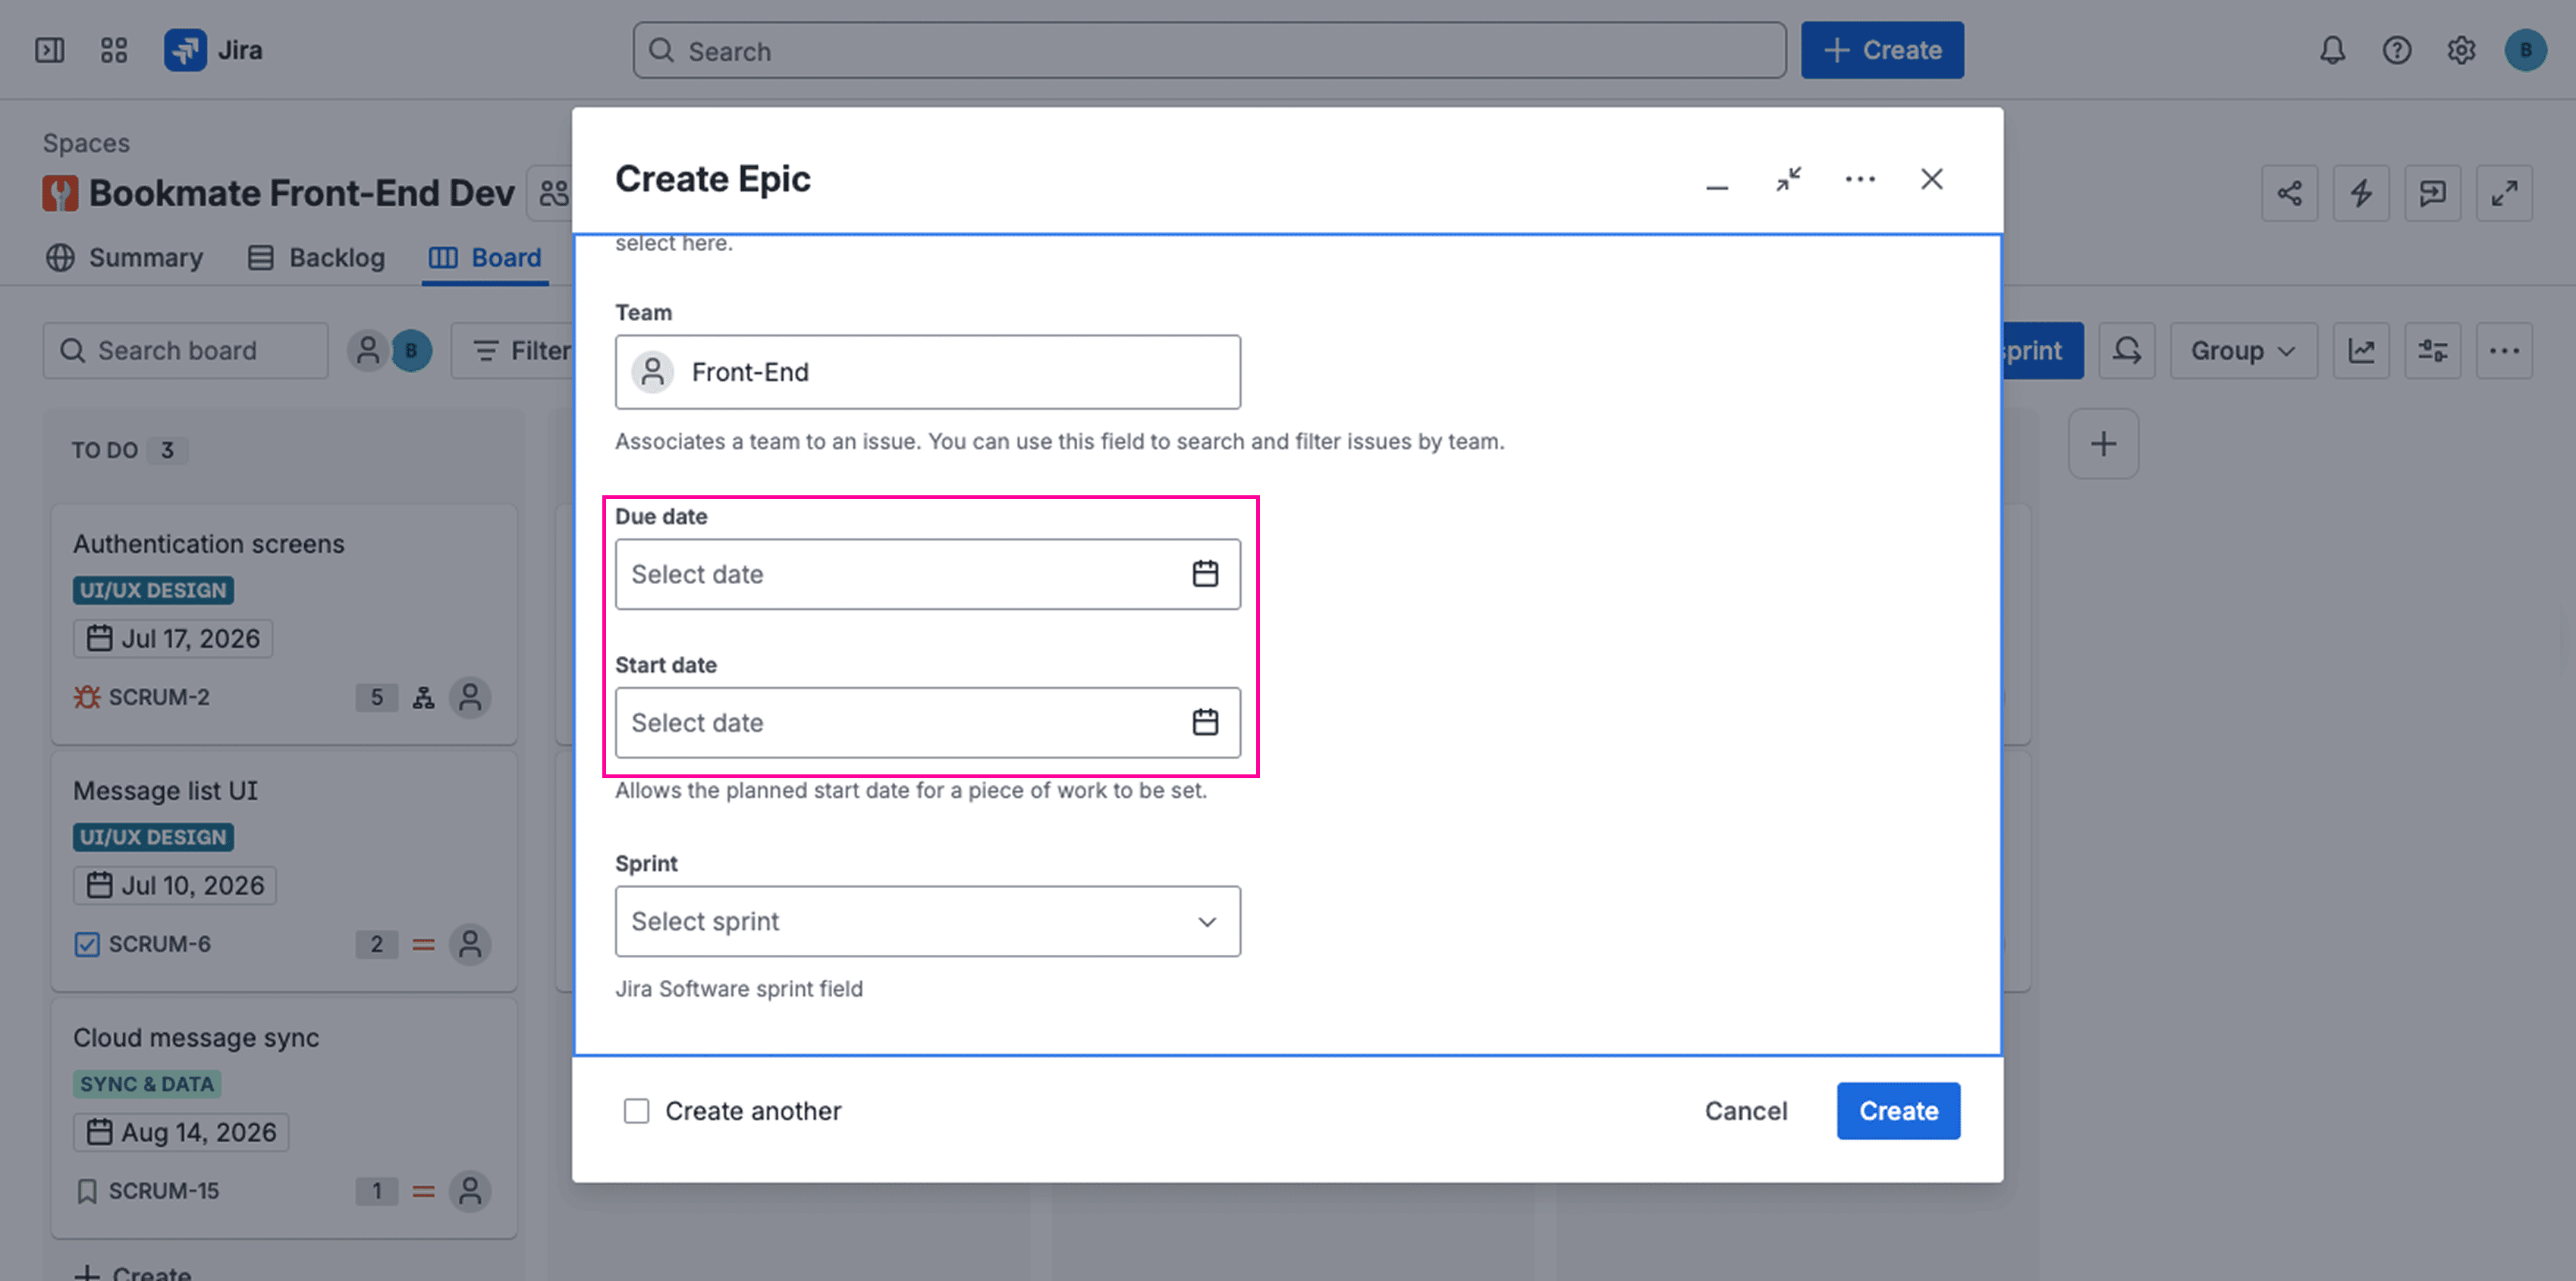
- Giving it a start date and a due date to set deadlines for the work it represents.
- Adding child issues — stories, tasks, bugs — underneath.
- Optionally, setting dates on the children too.
Here are a couple of things to take heed of:
- The roll-up rule: If you don't add dates to a parent epic, Jira will roll up the range from its children. The bar takes the earliest child start date and the latest child due date. Manually-set dates on the parent override the roll-up.
- The “missing field” trap: In company-managed projects, the Start date and Due date fields aren't on the issue screens by default, and you have to add them manually via Project settings → Screens. This is one of the most common reasons work items don't show up on the timeline as expected.
Adjusting and managing the Timeline view
What’s useful about timelines is that they help your plan stay readable and current with minimal effort. The built-in controls help with that: you can adjust the schedule, narrow the focus, and check dependencies directly from the view.
- To move work, drag the bar to shift dates, or stretch it to adjust the duration. Jira saves the change back to the issue automatically.
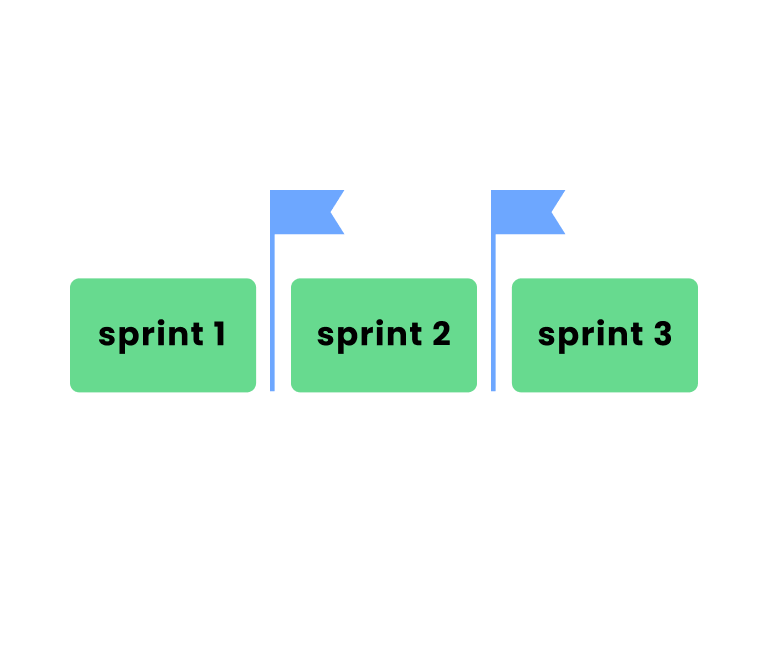
- To change the level of detail, Switch between Weeks, Months, and Quarters depending on whether you’re planning sprint work or preparing stakeholder updates.
- To reduce noise, use filters to focus on the work types or streams that matter for the current discussion.
- To see blockers and task dependencies, use Jira issue links such as “blocks” and “is blocked by.”
- To scan the plan faster, use color coding to group related work. In basic software timelines, child issues usually inherit the parent epic’s color. For status-based coloring, teams usually need Jira Plans or a plugin.
- To see child issues as bars, enable child-level scheduling and set the schedule mode to either “by dates” or “by sprints.”
Three common pitfalls teams run into with Timelines
Here’s what can go wrong when teams set up and manage timelines in Jira:
| **The pitfall** | **Why it happens** | **The solution** |
|---|---|---|
| Fake epics | Creating fake epics for operational work like bugs, support, or maintenance | Use epics to represent initiatives with defined boundaries; operational streams and individual tasks without a clear deliverable sit better as standalone work items or on a dashboard grouped by issue type. |
| Task overload | Pulling every small task onto the timeline | Show epics and a thin layer of significant child items — milestones, blockers, things stakeholders ask about. Leave the rest on the board. |
| Timelines going stale | Running behind on updates makes it impossible to assess project progress at a glance | Revisiting timelines in sprint planning and weekly status reviews vs. a quarterly cleanup. |
Limitations of basic timelines in Jira
The default timeline works well enough for single-project coordination or for teams that simply want a lightweight Gantt-style overview without spending hours configuring dashboards and filters.
Once teams begin scaling across departments or parallel initiatives, the inherent limitations of built-in timelines might become difficult to ignore.
You can’t include Epics from multiple projects in one roadmap
The most tangible restriction of Jira’s built-in timelines is scope. Timelines are tied to a single project, meaning epics from multiple projects cannot be combined into one shared roadmap unless the organization upgrades to higher-tier plans. Because of this native limitation, cross-team planning becomes a pain, things end up fragmented, and it's difficult to get a portfolio view of all projects. What's worse, this limitation is absolute, and you cannot circumvent it with a JQL filter.
Dependency mapping is basic
Although Jira supports issue linking, the dependency system itself is fairly basic. Users don't have distinct visual cues for conflicts, which means they have to look for bottlenecks manually.
Advanced dependency controls available in premium planning tools are also missing from standard plans, which means blockers may go unnoticed until delivery dates begin slipping.
Resource management and capacity planning are nonexistent
The basic timeline can't show you team capacity, workload distribution, or availability, so you can't reliably allocate resources based on who's actually free. Without that visibility, balancing assignments across teams becomes a tall order, especially during periods of rapid growth or overlapping deadlines.
Project tracking and status communication are limited
The Timeline gives you a visual view, but anyone who needs to check a project’s status has to log into Jira and find the right project. There's no native way to export a clean snapshot, embed a live view in Confluence with proper formatting, or send stakeholders a link that opens directly on the right zoom level.
It means that status updates outside Jira, such as slide decks, weekly emails, and exec dashboards, have to be pieced together by hand from screenshots and notes. For teams reporting upward regularly, that overhead adds up.
Hierarchy is limited
Jira's default work item structure goes: epic → story / task / bug → subtask. The Timeline only renders the top two of those. Subtasks don't appear on the view at all, even when they have dates filled in. That's the first practical limit.
The second shortcoming is that there's no native level for grouping multiple epics together. That'll do for a single-team planning, but not for product orgs where ten epics across three teams roll up into one strategic initiative (”Q3 onboarding redesign”). You either pretend one of the epics is the parent (which breaks the parent's own meaning), or you track the initiative outside Jira in Confluence, a spreadsheet, or a slide deck — and then sync it manually every week.
Higher hierarchy levels are part of Plans (Premium), where you can define custom levels above the epic and name them whatever your organization calls them. Without Premium, the only workaround is issue links, but those don't show up on a timeline.
As a result, the Timeline often feels incomplete in both directions. It's too shallow for strategy and too empty for story-heavy teams, which leads to workarounds that weaken its usefulness over time.
Jira Timeline vs. Advanced Roadmaps (aka Jira Plans)
If you find the Basic Jira Timeline view lacking (for example, you need higher-level planning, better dependency tracking, or coordination across multiple teams, etc.), you can move on to Advanced Roadmaps (now Jira Plans), which is a native Jira solution available on premium tiers.
Advanced Roadmaps provides higher-level strategic planning and stakeholder communication, focusing more on long-term objectives and key milestones than detailed task execution. Project managers use these features to oversee progress, monitor milestones, and make necessary adjustments to ensure deadlines are met.
However, these improvements come with some tradeoffs. The most obvious is cost. Advanced Roadmaps is only available with Jira Premium, requiring an upgrade for the entire organization. Complexity also increases considerably.
For teams that simply want better visibility without fully restructuring workflows, Advanced Roadmaps can be excessive.
In practice, the upgrade makes the most sense for enterprise-scale coordination involving many teams and departments.
How to get more advanced project timelines in Jira without upgrading to Premium
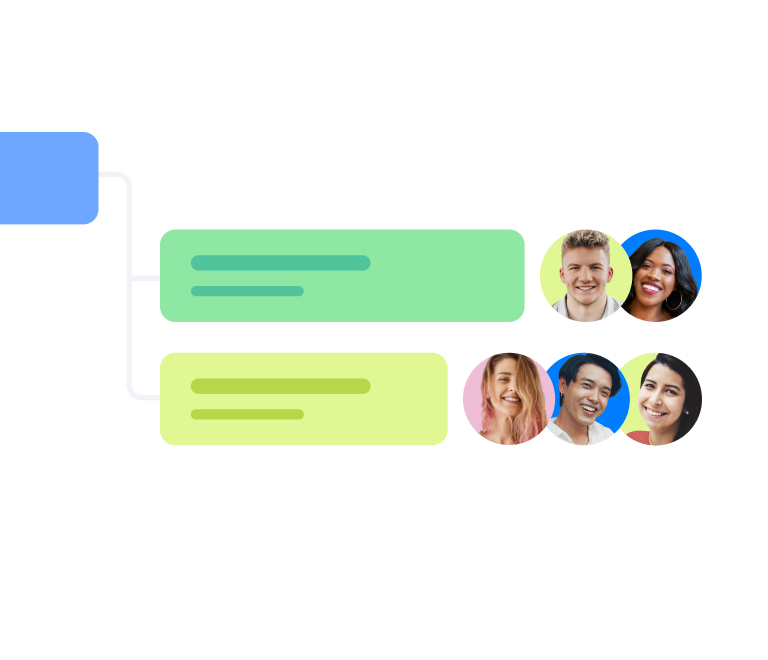
When the default timeline seems too limited, but Jira Plans feels too expensive, teams usually resort to dedicated Jira plugins like Planyway. Planyway brings advanced cross-project roadmaps, resource management, and dependency tracking — all within a single timeline and subscription.
At the stakeholder level, it pulls all projects into one view, so executives see what's happening across teams and projects.
At the project manager level, planning happens directly on the timeline. The interaction is akin to Jira's Timeline, but Planyway also works across projects, supports the full issue hierarchy, and adds milestones and epic milestones for marking important dates like releases, demos, or external deadlines.
At the team lead level, the workload mode shows capacity on a team or individual level — this helps avoid bottlenecks and assign tasks.
And for teams managing several projects at once, Planyway's multi-board view combines issues from multiple Jira boards into a single unified timeline.
| **Feature** | **Jira basic Timeline** | **Jira Plans** | **Planyway** |
|---|---|---|---|
| Cross-project view | Not possible in the basic project timeline | Combines multiple projects, boards, and JQL filters into one plan | Combines multiple projects, boards, and JQL filters into one plan |
| Issue types and hierarchy | Epic-centric. Shows epics and scheduled child issues; subtasks and standalone issues are limited | Custom hierarchy levels above epics; subtasks are still limited on the timeline | Supports subtasks on the roadmap, Сustom grouping, and flexible issue display |
| Zoom and time scale | Weeks, months, and quarters | 3 months, 1 year, Fit, Custom | Days, Weeks, Months, Quarters, Years |
| Milestones, sprints, and releases | Limited, mainly focused on scheduled epics and child work | Supports releases and milestones | Shows milestones, epic milestones, sprints, and Jira releases |
| Dependency management | “Blocks” / “is blocked by” links shown as connector lines, no conflict warnings | Cross-project dependencies with conflict highlighting | Cross-project dependencies with conflict highlighting |
| Resource management | Not included in the basic Timeline | Team-level and sprint-level capacity planning | Workload mode with per-team and per-member capacity tracking |
| Sharing and export | Mostly an in-Jira working view; stakeholder-ready sharing is limited | Sharing and export options for plans | Shareable roadmap views and export options |
| Scalability | 5,000 work items / 500 parent-level items | Up to 10,000 work items, 100 projects, 50 teams per plan | Scalable via focused source filters: projects, boards, or JQL |
Basically, Planyway acts as a visual planning extension that fills many of the gaps left by the default timeline and Jira Plans. It's also free for teams of up to 10 members, which is a low-risk way to kick its tires without a heavy commitment.
The bottom line
For smaller teams and projects, the default Jira Timeline delivers just the right level of visibility required to keep things on track without unnecessary hoop jumping. Those teams that need enterprise-grade planning usually upgrade to Jira Plans. For everyone in between, dedicated visual planning plugins like Planyway can fill in the gaps with minimal cost and operational overhead.
The right choice ultimately depends on the team size and how much planning infrastructure is actually needed.
FAQ
You need to open your Jira project, go to the Timeline tab, create epics with start and end dates, and organize related tasks beneath them. Work can then be adjusted visually by dragging items across the schedule.
The timeline is the visual timeline interface itself, while the roadmap refers more broadly to the strategic planning approach.
The default timeline feature can't bring multiple projects into a single timeline. Multi-project planning requires either Advanced Roadmaps in Jira Premium or third-party tools like Planyway.
Teams typically use issue links such as “blocks” and “is blocked by,” though many teams use external timeline tools for clearer visual dependency management and conflict detection.